Tag Archives: Gluten free

Moroccan-spiced chickpea and squash stew

The temperature has dropped, fall produce is showing up at markets, and I am starting to crave warm and spicy autumnal foods.  But there are still so many tomatoes to be eaten!  This recipe perfectly blends the summer and the fall, making it a delicious shoulder-season meal.  Grilling the squash lends a beautiful, smoky flavor to please carnivores and herbivores alike — but you could roast it as well.

I actually had some delicata squash pop up out of the compost in my garden in my old house.  I bought one more from the farmer’s market.  You could use any kind of orange winter squash.

This recipe is very flavorful but I think even those who prefer more mild dishes could handle it.  As strong and fragrant as the cinnamon will smell, it actually lends just a very subtle touch in the end and works perfectly with the cumin.

Moroccan-spiced stew with chickpeas and grilled squash
Adapted loosely from here, and probably some other recipes for inspiration; there are a lot of google results for “Moroccan squash stew.”

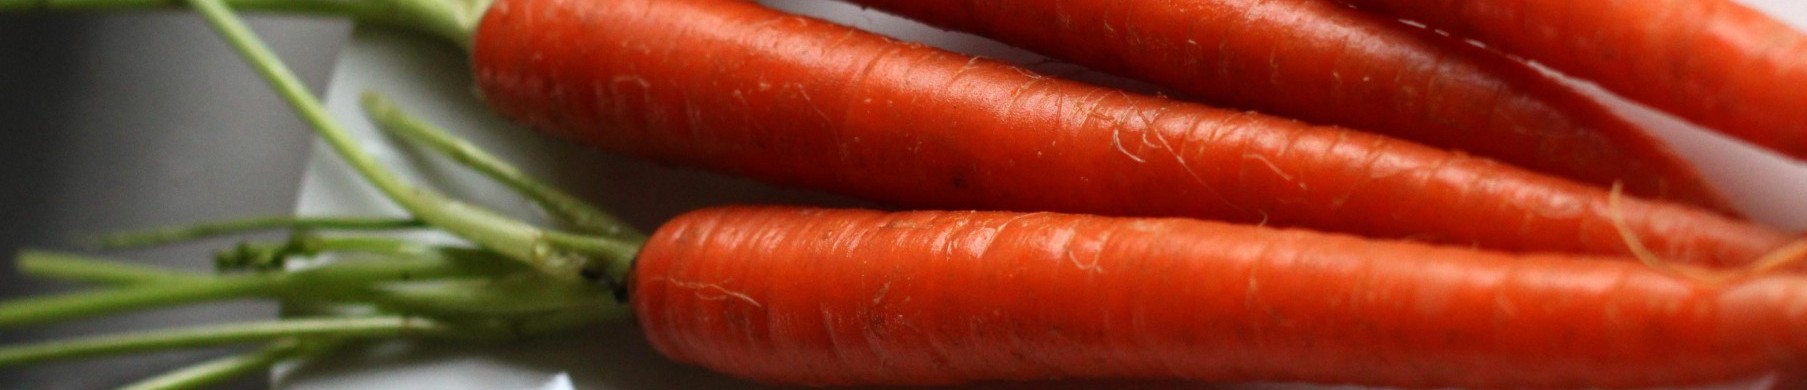
1 lb squash — butternut, acorn, delicata, or even pumpkin
4-6 medium tomatoes, peeled, seeded, chopped
2 cups chickpeas (or one can)
4-5 small red potatoes, peeled and diced
1 medium onion, diced
4 cloves garlic, slivered
1 bunch greens (I used Tuscan kale, but spinach would be find)
A few hot peppers (I had some cayenne but you could use jalapeno, serrano, etc)
2 teaspoons freshly ground cumin
1 cinnamon stick
bunch of coarsely chopped celery, carrot, onion for stock
salt and pepper to taste
For garnish:  bunch cilantro, plain yogurt, hot sauce
Quinoa (healthy) or couscous (authentic) for serving

Make the stock:  toss a few handfuls of coarsely chopped celery, carrots and onion (I actually freeze celery/carrots in bags for this  purpose), plus the cinnamon stick, some dried mushrooms, a few peppercorns, thyme, etc — whatever sounds good in a stock — and cover with water.  Simmer until reduced in half, about an hour or so.  You will need two cups of stock.  Strain and set aside.  (NOTE:  you can obviously buy pre-made stock, but if you’ve got time, may as well do it yourself).

Peel and seed the tomatoes.  I’ve always just blanched them, but recently came across this easier method.  Chop them coarsely.

To prepare the squash, peel them, cut in half, scoop out seeds, and grill.  They do not need to be fully cooked at this point, just charred.  When they are done and cool to the touch, dice them.

Saute the onion in a large pot over low-medium heat for about 10 minutes with the cumin (and cinnamon stick, if you are using premade stock).  Add the tomatoes, garlic, chickpeas, potatoes, peppers, and grilled squash.  Raise heat to medium-high and cook for another 5-10 minutes or so, until the squash and potatoes are somewhat cooked and the tomatoes are getting saucy.  Add the stock.  Add the greens.  Simmer everything together until it is flavorful and stew-y, about 30-60 minutes (the longer the better!).  Check periodically if you need to add more stock.

Add salt and pepper to taste.

When it is done, garnish with cilantro leaves, hot sauce, plain Greek yogurt, etc.  Serve over quinoa or couscous.

Mmmmmm.


A tropical barbeque

Welcome summer!  It’s been a while since I’ve had a chance to update.  What can I say…it’s wedding season!  But finally, a free weekend, and I’ve got a lot of catching up to do!

The summer season began with a HOT Memorial day weekend, and while it has cooled off temporarily it’s looking to reach into the 90s again soon.  It’s been…an adjustment.  But I’m trying to embrace summers in Washington with no AC, and what better way than to bring a taste of the Caribbean to you?  After all, it’s too hot to turn the oven on, and we had to inaugurate this shiny new addition to our backyard:

Thus we came up with a menu inspired by the tropics:  Chicken/tempeh with a jerk marinade, golden steamed cabbage, coconut rice, and fried plantains!

To make the Jerk marinade:

These traditional Jamaican flavors are SPICY and not for the faint of heart!  I rather naively slathered it onto my tempeh, but please, go easy on it if you can’t handle extreme heat.

This can obviously be used for any kind of meat, but tempeh, a cultured soy product, is a great vegetarian alternative for the grill.  It is easy to work with and soaks up flavors fast!

I believe Mr. R adapted his recipe from this one.  Scotch bonnet (habanero) peppers are key, as is allspice, nutmeg, cinnamon, cloves, sugar…  stay with me here, I know these sound like the ingredients for Christmas cookies, but the flavors meld together perfectly.  Thyme is also important, and sometimes you’ll see various aromatics like onions, garlic, scallions, and ginger thrown in too.  I am by no means an expert so please feel free to weigh in if you are.  Compare and contrast different recipes and see what looks good to you!

Do not try to replace the scotch bonnet peppers, however.  It just won’t be quite the same.  Check out a Latin grocer if you can’t find them at your regular grocery store.

Blend up all the ingredients and rub onto the protein and let sit, in a container or bag, for 30 minutes or so in the fridge.  I will say it again — go easy!  It will be SPICY!

Simply grill the tempeh over direct heat for about 5 minutes on each side. And now your vegetarian friends can join in the joy that is grilling during the summer!

Coconut rice

This recipe is DEFINITELY one I am working into my regular meal rotation — it was fantastic!  Not to mention it smelled amazing during the preparation as well.  It also made a freaking ton of rice and we had leftovers all week.  With black eyed peas worked in — it’s a complete protein!

Ingredients
Adapted from here
2.5 cups long grain basmati rice
1 can coconut milk
1 cup dried black eyed peas
4-6 cloves garlic, crushed
4-6 scallions, white and green parts, chopped
1/4 teaspoon ground allspice
3 teaspoons salt
a few sprigs of fresh thyme, or a dash of dried thyme if unavailable
1 scotch bonnet/habanero pepper, minced

Cook the beans as you normally would — soak for several hours or overnight and then simmer for an hour.

Add the coconut milk to the beans cooking in their pot, then bring to a boil with the salt and seasonings, plus the scallions, garlic and pepper.

Stir in the rice and reduce heat to a simmer.  Cook for 20-30 minutes, until rice is done, liquid is absorbed, and your kitchen smells like heaven.

Golden steamed cabbage
Adapted from this website.

I love all brassicas — they are my favorite vegetables — and cabbage is no exception.  This adds a pretty note of color to your plate!

Ingredients
1 head cabbage
Assortment of 2-4 sweet and hot peppers, including scotch bonnet
1 medium onion
a few sprigs of fresh thyme (or dash of dried)
1/4 teaspoon turmeric
Salt and pepper to taste

Thinly slice the cabbage, removing the center core.
Heat a large pan with a generous amount of olive oil or butter and saute the peppers and  onions with salt, black pepper and turmeric briefly, until translucent.  Add about 1/4 cup of water, adjusting as necessary, and then add the sliced cabbage to the pan.  Cover and allow to steam until cabbage is translucent, tender and reduced in size.  Remove cover and allow excess water to steam off if necessary.  Adjust seasoning to taste.  Savor.

Fried Plantains


A tropical dinner is just incomplete without fried plantains.  They are simple but taste great with accompaniments such as guacamole.  We followed Alton Brown’s method.  They came out great!

This meal was something new and different for us and such a fantastic way to welcome summer with friends.  I can’t wait to make it again!

-R

Falafel!


Whenever I think of the best food I’ve had that has come from a truck or hole-in-the-wall-with-no-seating establishment, they all have one thing in common.  They are all falafel.

My mind often wanders to the amazingness that was the falafel I had with harissa sauce in NYC, my favorite little (emphasis on little) falafelshop I used to frequent during college here in DC, and budget college spring break trips to Germany and the Czech Republic where falafel at the doner kebab joints made up just about every meal.

These days, though, we mostly just make falafel at home.  There is no reason not to.  It is super easy.  Here is our method.

The falafels

Put away that boxed falafel mix.  You don’t want any of that crap.  Falafel is, in essence, just pureed chickpeas with spices and flavorings.  It really doesn’t take any more effort to dump a can of chickpeas into a food processor than it does to open the box and hydrate it with whatever.  And the results will be with it.

We’ve tried a bunch of different recipes over the years.  This one from Cooking Light is the easiest as it already includes binders like egg and breadcrumbs.  If this is your first time, try that one.

This one and this one are a little harder, but they are more authentic, as well as vegan and gluten-free.  The puree must be as dry as possible and the oil must be 350°.  Start with just one test falafel and if it falls apart, add some flour to the remaining puree to keep it together.

It is essential that you toast and grind your whole cumin seeds to achieve that quintessential flavor.  Do not use preground cumin.

Now, most restaurants will form the falafel into little balls and deep fry them.  I can’t blame you if you’re not up for deep frying.  Just form the falafels into little patties and pan fry them in 2-3 inches of oil, flipping halfway through until they are crisp and browned on the outside.

The pita
I find most store-bought pita to be straight up disgusting.  So dry and stale and flavorless it is not even worth spending the time to make falafel unless you are willing to make the pita yourself.  Luckily, it is easy (but time-consuming).  It helps if you are working with a partner.
I can’t recall all the recipes we’ve tried but this one was the most recent.  It doesn’t exactly always puff up to form perfect little pockets on the inside, but it mostly does…and when this bread melts in your mouth I think you will forgive any slight imperfections.

With a cast iron griddle pan, it’s easy to do…just make the dough, divide into balls, roll out roughly into circles, and cook on each side for a few minutes.  No baking or ovens.

The accompaniments
Some like their falafel with tahini, or hummus (which is a little wtf to me, chickpeas on your chickpeas?).  But my very favorite thing to add is an inordinate amount of tzatziki sauce.  In fact, one might accuse me as eating falafel as merely a vessel for tzatziki, but whatever, I like it all.
I’ve tried a few recipes but the one I’ve deferred to lately is this self-declared World’s Best Tzatziki Sauce Recipe.  And I have to say it is pretty darn good.  And really easy!  I do like to add some extra garlic though because one clove is never, ever enough for me, for any recipe!

In NYC I had a falafel sandwich with harissa sauce and it was ahmaaazing.  I haven’t made it myself before but I think I will give it a shot sometime soon.  Here is a recipe from Fine Cooking.

In addition to sauces, I always like a little red cabbage, onion, fresh cilantro, sliced tomato…obviously, there are endless possibilities, the rest is up to you!

While everything all together can be a lot to cook for one night, the falafel itself is pretty quick and if you make a big batch of tzatziki, bread, etc, you can have several easy weeknight meals worth of  food.  Falafel is best served fresh, but any leftovers can be crisped up again in a toaster oven.

Don’t be intimidated by pita from scratch, deep frying, or red cabbage.  Give homemade falafel a try!  You won’t be disappointed.

Homemade granola bars

Granola bars are an easy and portable snack, but store-bought varieties leave something to be desired.

Take a look at a smattering of ingredients for Quaker brand granola bars:  soy lecithin, sodium hexametaphosphate, blue 1, corn syrup solids, just to name a few.  I don’t know about you, but I think of granola as a healthy snack, and I sure don’t want to enjoy these industrial ingredients alongside!

Luckily, a profoundly more healthy and delicious granola bar can be easily made from scratch at home.  High in fiber, antioxidants and healthy fats, this is a treat you won’t feel guilty about.  I like to make a batch on the weekends so I have a quick and easy snack to grab throughout the week.

Homemade granola bars
Adapted from a combination of Alton Brown’s and Alicia Silverstone’s recipes

Ingredients

8 ounces rolled oats (about 2 cups)
1.5 ounces raw sunflower seeds (about 1/2 cup)
3 ounces sliced, blanched almonds (about 1 cup)
1.5 ounces ground flax seed (about 1/2 cup)
6 ounces honey (about 1/2 cup)
1.75 ounces maple or raw turbinado sugar (about 1/4 cup)
1 ounce safflower oil, plus more for pan
2 teaspoons vanilla extract
1/2 teaspoon salt
Dash cinnamon
6.5 ounces dried berries and/or freshly shredded coconut

Preheat oven to 350°.  Place oats, sunflower seeds, almonds, flax and coconut (if using) on a baking sheet and bake in the oven for about 15 minutes, until brown and toasty.

While waiting, combine the honey, sugar, vanilla, oil, cinnamon and salt in a saucepan and warm over medium heat until sugar is completely dissolved.

When the oat mixture is done, combine thoroughly with liquid mixture in saucepan, and stir in dried fruit.  Reduce oven temperature to 300°.  Spread evenly in a 9×9 pan and bake for 25 minutes.

Allow to cool completely before cutting into squares and serving, otherwise it will crumble apart.

I like to wrap them individually so I can grab one as needed!

-R


Cookbook review: The Kind Diet

The movie Clueless came out when I was in middle school or thereabouts, a most impressionable, celebrity-obsessed age, and while I don’t remember exactly when I became vegetarian, it was around that time, and I imagine Alicia Silverstone had something to do with it.  Her name has recently resurfaced following the publication of her best-selling book, The Kind Diet, and in search of dairy-free recipes in keeping with my new year’s resolutions, I picked it up at my local bookstore.

Overall, I am pretty excited about the recipes in this book — I’ve already tried out a few and am excited to make more.  I would definitely recommend this book to anyone interested in healthy living.

However, there are a few drawbacks:

She makes some unsubstantiated claims. Some of her advice is a little too heavy with the Traditional Chinese Medicine.  I know that this is an ancient practice with some benefits, and I myself have tried acupuncture before with much success — but some of the stuff she writes is just a little wacko.  For example, she says that we should never eat fruit grown outside of our climate, because it “weakens the blood.”  Um….okay.  Easy for a Californian to say!

Her attitude toward meat and dairy is a bit hyperbolic. That meat causes every disease known to man may hold true for fatty, red meats — I tend to agree that those are not healthy in any way, especially in the quantities considered normal today.  But I think the truth is a little more nuanced than she portrays it; certainly, lean meats raised in a natural environment can be a healthy part of your diet if that is your choice.

Too many fake substitutions! As a whole she avoids this pretty well, which was the appeal of the book to me.  But I don’t know how she can claim to avoid processed foods on one page and extol the virtues of soy and seitan on the next.  This is my primary issue with vegan diets overall, however.  She does make a point to say that the most processed soy products (soy milk, all the various fake meats, etc) should be eaten in moderation, but for some reason tofu is okay.  Hmm.

That said, I think the pros outweigh the cons…

Recipes include new, interesting ingredients. Though some ingredients have been hard for me to find (like lotus root), I have been happy to discover recipes for vegetables and products I had never thought to use before.  Daikon root, radicchio, mochi, sunchoke — I’ve seen these in stores but never had any idea what to make with them.  Now I know!

She is not too preachy. She does not advocate converting to a full-fledged vegan straight away.  There are three different “levels” to attain, which allows you to gradually incorporate healthier, kinder eating into your diet.  She also is not one of those snotty, rigid vegans who believe that you cannot be considered a vegan if you dare have one drop of honey every 10 years.  She even admits to occasional cravings of sushi that cause her to grab a piece of fish.  I REALLY appreciate that kind of attitude.  I just believe we should define our approach to life by what we can and are doing to help our bodies and the planet, not what we’re failing to do.

It offers a comprehensive array of recipes. Breakfast, lunch, dinner, dessert, snacks, on-the-go meals, kid-friendly recipes — it has everything.  There is some great inspiration on these pages for some new ideas I’d never would have thought of myself.

Recipes are energy-intensive and full of nutrition. This is how it meshes so well with my food philosophy.  It offers some terrific ideas for getting the nutrients and vitamins you need on a plant-based diet without any calorie counting.

Overall, I’m pretty glad I picked up this book.  After all, it is the source of inspiration for my new favorite breakfast! Not quite vegan, due to the eggs, but meat, dairy and gluten-free!

Pan-fried mochi with scrambled egg whites and greens


I had never even heard of mochi before but after reading her recipe I was officially intrigued.  I stopped at my grocery store and there it was, in the section with the meat substitutes.  But mochi is not a meat substitute — it is made from  brown rice, processed into a cake.

You buy it in a big block form, cut it into small pieces, and either bake or fry them.  They puff up into strange shapes, get crispy on the outside but retain a delicious creaminess on the inside.  You can serve them sweet or savory, alone or as the grain component of any meal.  You can even cut it into strips and place across your waffle iron to make crispy mochi waffles!

My latest obsession has been eating them with my scrambled egg whites in the morning, instead of a piece of toast.

Ingredients
1 egg
1/4 onion, diced
Handful of frozen chopped spinach, or other green of choice
1 package mochi

Method

Heat a cast iron or other heavy-duty skillet over medium-high eat with about a teaspoon of extra virgin olive oil.

Cut mochi into one-inch squares using a heavy knife.

Place squares into the pan, reduce heat to low, cover and cook for about four minutes.  When the four minutes are up, flip them over and cook for another four minutes on the other side. Add a few drops of soy sauce.

While you are waiting, start sauteing the onion in a separate pan.  When it is translucent, 1-2 minutes later, add the spinach and cook until it is thawed and cooked through. Add a splash of white wine vinegar.

Turn heat to low.  Crack an egg into the pan ( it is safe to eat up to seven egg yolks a week if you have healthy levels of cholesterol.  Otherwise, just use the egg whites — it is low in fat but still high in protein).

Scramble egg as you normally would, stirring continuously to combine with onion and spinach.

So filling, healthy and delicious!

-R

An Asian/vegan/gluten-free extravaganza

I really love most Chinese, Thai, Vietnamese and other Asian cuisines.  They are vegetarian-friendly and for the most part dairy-free, and thus cooking authentic recipes requires little substitution or adaptation.

The other day I had a good friend over who spent a year in Thailand and shares my enthusiasm for this regional cuisine.  She also eats gluten-free and even with our combination of diet restrictions, most Asian food meets our needs!  So we put together a wonderful feast blending some dishes from Thailand, Vietnam and Burma.

My recipes below were adapted from The Asian Vegan Kitchen by Hema Parekh.

This book has a really lovely assortment of authentic recipes from multiple countries.  Just be forewarned that you may become, as I was, a bit overwhelmed by the sheer number of required ingredients not readily available, and a few new techniques.

So I tried to keep our dinner menu simple:  rice, noodles, a salad, a couple sides, and a few sauces and garnishes.  Here’s what we made:

Spring rolls

Go here for my recipe.
So simple and fun to make with friends, no cooking required, and so yummy!
I sliced up a bunch of veggies beforehand and we each filled them to our liking.

Green mango salad
I had a version of this a few years ago while in Vietnam and my whole life since then has been a quest to recreate it.  AMAZING.  So delightfully tangy and spicy, you will be surprised how much you like this.
The one I had in Vietnam was a simpler version — I am guessing it has just a simple sauce with cayenne powder, lime juice, maybe some soy sauce?  But this recipe below is good too.

Ingredients
1-2 large green mangoes, peeled and grated
2 cloves garlic
5 small hot chilies
3 shallots
1 T soy sauce
1 T lime juice
1 T sugar
1/2 t salt
Fresh cilantro

Combine the garlic, chilies and shallots in a food processor and blend until smooth.  Mix with other ingredients and toss with mango.  Garnish with cilantro.

Stir fried spinach and tofu

If you visit Southeast Asia you will inevitably have a chance to taste water spinach, also referred to as morning glory.  Cut into long, thin strips and usually sauteed with a simple dressing, it is great with rice and noodles.  It is actually considered invasive in the US however so it can be difficult to find.  Regular spinach is a suitable substitute, and what I ended up using.

Ingredients
1 large bunch spinach, coarsely chopped
2-3 scallions, sliced, white parts discarded
1/2 package tofu, water pressed out and cut into strips
1 stalk lemongrass, minced and crushed
1 package enoki mushrooms
3/4 inch piece of ginger, peeled
3 shallots
3 fresh chilies
2 cloves garlic
zest of one lime
salt to taste
2 T vegetable oil
1 T soy sauce

Bring a large pot of water to a boil and quickly blanch the spinach for 1 minute.

Using a food processor, coarsely blend the ginger, shallots, chilies, garlic, lime zest and salt.

Heat oil in a large pan over medium heat and stir fry the tofu until golden.  Add the mushrooms and cook until softened.  Remove tofu and mushrooms.

In the same pot, saute the blended spice mixture for 2-3 minutes.  Add the lemongrass, scallions, tofu, mushrooms and spinach.  Drizzle with soy sauce and raise heat to high, cooking for an additional minute.

Sauces and garnish

You could easily make a meal just out of these with some rice and/or noodles.  Julienne some fresh carrots, daikon, cucumber, mung bean sprouts, etc; slice some chilies, cilantro and scallions; throw in some shitake mushroom caps, and crush some peanuts.  Serve them fresh, like with spring rolls, or lightly saute them together.  The sauces add a major kick of deliciousness.

For additional flavor, reserve the liquid used to rehydrate the shitake mushroom caps and use this liquid in place of water for the sauce recipes.

Spicy Chili Sauce

Ingredients
3 fresh hot chilies
2 cloves garlic
3 T cilantro
3 T lime juice
3 T soy sauce
3 T water
1 T powdered sugar

Blend all ingredients in a food processor until smooth and sugar has dissolved.

Vietnamese Dipping Sauce

Ingredients
1 cup water
1/2 cup soy sauce
2-3 reconstituted shitake mushroom caps, pureed
4 T fresh lime juice
3 T powdered sugar
2 cloves garlic, minced
1 t cayenne pepper
1-2 scallions, chopped.

In a saucepan, combine water, soy sauce and mushroom puree and bring to a boil.  Turn down heat and simmer for 2-3 minutes.

Add all the other ingredients and stir until sugar is dissolved.  Adjust seasoning as desired and garnish with scallions.

I also served some sweet chili sauce/Thai Crystal, recipe here.

Everything was so delicious!  I was so glad I picked up that cookbook; it was definitely legit, and I can’t wait to try more recipes from it!

-R

Quinoa risotto

If quinoa isn’t already a part of your diet, I highly recommend giving it a try!  Yes, it looks a little weird — but once you get past its appearance, you will discover a delicious and incredibly healthful ingredient.

It can usually be found in your grocery store with rice and other grains, and it is eaten much the same way — though quinoa isn’t actually a grain, but rather the seed of a leafy plant.  As a member of the Chenopodioideae family, spinach and beets are close relatives.  It is native to South America and has been a very important component of Andean diets for centuries.

Quinoa is one of those rare plant sources of a complete protein, which makes it ideal for vegetarian diets.  It is a great replacement for rice in almost any dish — I actually prefer it in some recipes, such as chili.  It also cooks super fast, making it a fast, fool-proof weeknight dish.

You can find several different kinds — I got this awesome fair trade black variety for Christmas, and it stays nice and crunchy after cooking.  But regular old quinoa is also good too.

When cooking quinoa, for best results, always rinse the seeds in cold water first, and always use stock instead of water as your primary cooking liquid.  Toasting the seeds in a dry skillet prior to cooking is also a nice option.

To cook them, just combine one part quinoa to two parts stock, bring to a boil, and simmer until all water is absorbed, about 15 minutes.

As mentioned above, you can use quinoa as a healthy, quick-cooking replacement for rice in many dishes.  But here is one recipe that really highlights the nutty, crunchy, delicious flavor of quinoa!

Quinoa “risotto”

This does not have the same creamy, thick texture that can only be achieved by arborio rice — hence the quotation marks — but it is still pretty darn delicious, and MUCH easier!

Choose whichever vegetable mix-ins you like.  Always start with some alliums, such as onion, leek, or garlic, and go from there.  I had some onion and garlic on hand.

I also love these little beech mushrooms I find at the store occasionally, and think they look so cute in risotto dishes!  When I saw them this week, I knew what I was making…

A handful of chopped tomatoes are also good — you don’t want them to overpower with their acidity, but they do add nice flavor.  This time of year, cherry and grape varieties are the only available tomatoes with any semblance of flavor, so just grab a half cup or so of those — you can halve them or keep them whole.

My final favorite ingredient to add to this dish is a bit of chopped spinach — I always keep a bag of frozen spinach on hand and toss some in.  Unfortunately, I was running low so I think I only had about a quarter cup left to add, but a half to a whole cup would be more ideal.  There really aren’t any rules…

Anyway.  On to the method.

Start the quinoa.  Check the package directions if they exist, but generally, as mentioned above, you just combine 1 part quinoa with two parts liquid (use stock!), bring to a boil, and simmer about 15 minutes.

(I don’t think you can really screw quinoa up as is so easy to do with rice.  Before I realized black quinoa is supposed to be crunchy, I kept adding more water, thinking it was undercooked.  It just kept cooking and cooking with no discernible difference in taste, texture, etc…)

Saute your onions/leeks/whatevs.  Caramelizing is nice, if you’re up for it, but if not, just wait until they’re translucent and add the garlic and mushrooms. Also add some salt, pepper, and spices — I used some of Penzey’s Shallot-Pepper blend but some basic Italian seasoning or your own combination of thyme, rosemary, oregano, etc would be nice too.  I also added some crushed red pepper for some heat.

I added the tomatoes at this stage too because I like them very wilted, saucy and really cooked into the dish.  If you like them less cooked, just add them later on.

When the spices are fragrant and the veggies have started to cook down a bit, add about a half cup of dry white wine.

I had mistakenly believed I had an open bottle of wine available, but as it turns out, someone DRANK it all ;).  So in a pinch I used a splash of white wine vinegar and some more veggie stock.

Allow everything to cook and flavors to meld in this mixture for about 5 minutes, until the wine has reduced some.

Stir in the quinoa and the spinach.  Keep stirring until the liquid has mostly absorbed.

Feel free to sprinkle some parmesan cheese on top, then EAT!

Enjoy!

-R

Homemade Paneer

Saag Paneer, an Indian spinach and cheese dish, is in regular rotation in my household — served with a side of dal and rice, it is so easy and healthy!  Here is my blog post about it with the recipe.

But the one problem is that purchasing a block of commercially-made paneer from the store is so expensive.  Luckily, this Indian version of fresh farmer cheese is super easy to make — all for the cost of a gallon of milk and a few lemons.

So given it’s simplicity, paneer was to be my first foray into cheesemaking.  But even for those of you not interested in expanding your cheesemaking repertoire like I am, I encourage you to give this a try — it’s pretty difficult to screw up, and doesn’t take more than 10-15 minutes of active preparation.

These instructions are from Home Cheesemaking by Ricki Carroll.  Note that this recipe below yields 1.5-2 lbs and we halved it without any issues.  Starting with just a half-gallon of milk ended up with the perfect amount of cheese for one dish, but if you have extra, it will keep in the fridge for up to two weeks.

Also note that while butter muslin would work best for straining the cheese, it is not readily available everywhere — you could try using multiple layers of cheesecloth, or even just a thin dish towel.  Butter muslin can be purchased cheaply online, however, and is machine washable and reusable.

Ingredients
1 gallon whole milk
8 Tablespoons lemon juice

Directly heat the milk to a gentle rolling boil, stirring frequently.

Reduce heat to low and, before the foam subsides, drizzle in the lemon juice and cook for an additional 10-15 seconds.

Remove from the heat and continue to stir gently until large curds form (if the why is still not clear, return to heat and increase the temperature a bit, or add more lemon juice).

When you have a clear separation of the curds and whey, allow to set for 10 minutes.

While the cheese is setting, line a colander with some butter muslin and place over a bowl or in a sanitized sink.

Once the curds have mostly settled below the whey, ladle them into the muslin.

Tie the muslin together, and rinse the cheese under running water.  Gently squeeze the top of the bag to squeeze out excess whey.

Now, the cheese needs to be drained of the remaining whey:  either tie the muslin together and hang to dry on a spoon laying across the colander, or leave the cheese at the bottom of the colander, wrapping it entirely in muslin and placing a  five-pound weight on top.  I just filled the empty jug of milk with water until the scale said it was five pounds.

Let it sit at room temperature for 2-3 hours, less if you are using the weight method.

Without a cheese press, you can’t get a nice, neat block of cheese as you see in the store — it will look more crumbly, like feta.  It will also be slightly less firm than store-bought paneer.

But, the texture and the mouth-feel were pretty much the same!

On its own, paneer doesn’t have much in terms of taste but it picks up the flavors of recipes very easily — and so it works great in a dish like saag paneer.  I just broke off little pieces and tossed it into the pan.

SO GOOD!

-R